
Before you install Ghidra on Ubuntu
Ghidra is portable Java software, not a traditional Ubuntu DEB installer. The upstream project publishes a multi-platform ZIP containing the application, launch scripts, documentation, and platform components. A normal installation therefore means preparing Java, extracting the archive, and running the launcher. You do not need to copy files into /usr/bin or run the graphical application as root.
Use a supported 64-bit Ubuntu environment with enough writable space for the archive, the extracted application, Java caches, projects, imported programs, and analysis databases. Ghidra documentation lists 4 GB of RAM and 1 GB of storage for installed binaries as a minimum starting point; large firmware or decompilation jobs need more. A home-directory installation under ~/tools or ~/opt is easier to update and avoids permission problems.
Only analyze software, firmware, or memory images that you are authorized to inspect. A download guide can explain provenance and launch steps, but it cannot grant permission to reverse engineer a target. Keep every Ghidra release in a separate directory so you can compare behavior and roll back without overwriting an older installation.
Use sudo only when your Ubuntu package manager needs it. Run Ghidra and create projects as your normal user so configuration files, caches, and project ownership remain predictable.
Install the 64-bit JDK 21 on Ubuntu
Ghidra 12.1 requires a Java 21 Runtime and Development Kit. Install a full JDK, not only a runtime package, because the launcher and some workflows expect both java and javac. On Ubuntu releases whose repositories provide Java 21, the common package name is openjdk-21-jdk. If your repository does not provide it, use a trusted JDK 21 distribution such as the vendors named in the official Ghidra documentation and follow that vendor's Ubuntu instructions.
After the package manager finishes, open a new terminal and confirm the active version. The output should show Java 21 and a 64-bit runtime. If another application needs a different Java version, keep both versions installed and select the JDK for this launch with JAVA_HOME or Ubuntu's alternatives tools. Do not remove a JDK just because Ghidra needs a newer one.
If Ghidra later says that Java cannot be found, check the value of JAVA_HOME and make sure it points to the JDK directory, not directly to the java executable. The directory should contain a bin folder with both java and javac.
sudo apt update && sudo apt install openjdk-21-jdkjava -version && javac -versionDownload the official Ghidra ZIP
Open the official Ghidra 12.1.3 release and expand Assets. Choose ghidra_12.1.3_PUBLIC_20260817.zip. This is the named pre-built distribution. GitHub also shows Source code (zip) and Source code (tar.gz), but those are repository snapshots for people building Ghidra from source; they are not the normal Ubuntu installation archive.
The verified public ZIP is 569,445,154 bytes, approximately 543.1 MiB. This site links to the official GitHub asset and does not mirror, rename, wrap, or repackage it. If your browser saves an HTML page, a very small file, or an unexpected installer extension, do not run it. Return to the official release and select the PUBLIC asset.
Ubuntu users sometimes find Snap, apt, or security-distribution packages while searching for Ghidra. Those packages may be useful in a controlled environment, but their version, maintainer, and patch set can differ from the upstream release. Use the official GitHub asset when the goal is the current upstream build and a directly verifiable checksum.
| Release asset | Use for a normal install? | What it contains |
|---|---|---|
| ghidra_12.1.3_PUBLIC_20260817.zip | Yes | Official pre-built multi-platform distribution |
| Source code (zip) | No | Repository snapshot for a source build |
| Source code (tar.gz) | No | Repository snapshot in tar.gz format |
Verify the ZIP with SHA-256
The release notes publish a SHA-256 digest for the runnable ZIP. Hash verification is useful when the download was interrupted, passed through a proxy, or needs a documented provenance check. It detects changed or corrupted bytes; it does not make an untrusted mirror official and it is not a complete security audit.
Run sha256sum from the directory containing the downloaded file and compare the complete value with the official release digest: 93a5d11a9ad510622acaaf908c556a7b9b764d338e78a7567f3689bf5081fd54. If one character differs, remove the file and download it again from the official release page.
sha256sum ghidra_12.1.3_PUBLIC_20260817.zipExtract Ghidra and run ./ghidraRun
Create a user-owned tools directory, extract the whole archive, and preserve the directory structure. Do not start Ghidra while it is still inside the compressed file. A complete extraction should leave folders such as Ghidra, Extensions, support, docs, and server beside the ./ghidraRun script.
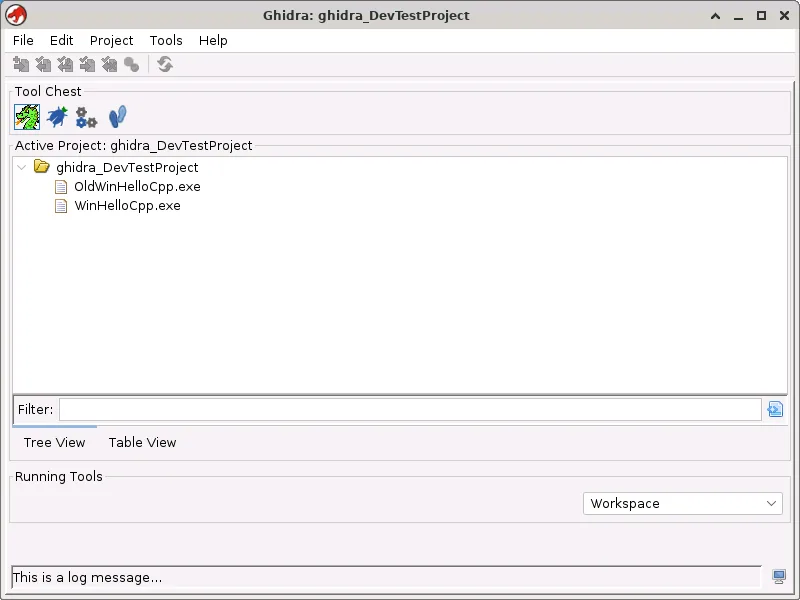
Run the launcher from the extracted directory as your normal Ubuntu user. On a fresh installation, Java may take a little longer to initialize modules and create user settings. When the Project Window appears, create a Non-Shared Project in a separate project directory. Keeping projects outside the application directory makes upgrades and backups safer.
If the shell reports Permission denied, inspect the launcher mode and add the executable bit only to the launcher. Do not recursively mark every file in the distribution executable. If the application exits immediately, run the debug launcher or start it from a terminal so the underlying error remains visible.
- 1
Create a personal tools directory
Keep the application separate from projects and avoid a root-owned GUI install.
mkdir -p ~/tools - 2
Extract the complete ZIP
Preserve all folders and write the application into a new versioned directory.
unzip ghidra_12.1.3_PUBLIC_20260817.zip -d ~/tools - 3
Enter the extracted directory
The launcher and support folders should be visible before you continue.
cd ~/tools/ghidra_12.1.3_PUBLIC - 4
Launch Ghidra as your user
Start the desktop application without sudo.
./ghidraRun
Ubuntu, WSL2 and desktop troubleshooting
For java not found or unsupported JDK errors, run java -version and javac -version again in the same terminal that launches Ghidra. If they point to Java 17 or a runtime-only package, install or select a 64-bit JDK 21. Set JAVA_HOME to the JDK home directory and avoid pointing it at /usr/bin/java, which is only a launcher symlink.
WSL2 can run Ghidra, but the experience depends on whether your Windows setup provides a Linux GUI path such as WSLg or an X server. A headless Linux shell can still use support/analyzeHeadless for batch analysis, while the desktop Project Window needs a working display. Check echo $DISPLAY and your WSLg/X-server configuration before treating a blank window as a Ghidra installation failure.
On Wayland, remote desktops, or non-reparenting window managers, Java rendering may need the launch property documented by Ghidra. Make one environment change at a time, keep the original support/launch.properties file, and collect the terminal error before searching for a workaround. For permission errors, move the application to an executable user-owned filesystem rather than running it as root.
| Symptom | Likely cause | First action |
|---|---|---|
| java or javac not found | JDK missing from PATH/JAVA_HOME | Install JDK 21 and open a fresh terminal |
| Permission denied | Launcher mode or noexec filesystem | Use chmod +x ghidraRun or move the directory |
| Blank WSL2 window | No WSLg/X display or Java window-manager issue | Check DISPLAY and the official launch-property notes |
| Immediate exit | Startup error hidden by the desktop launcher | Run from a terminal or use support/ghidraDebug |
| Wrong downloaded file | Source archive, HTML response, or partial download | Select the PUBLIC ZIP and verify SHA-256 |
Create a first project and upgrade safely
Use File > New Project and choose Non-Shared Project for a local Ubuntu setup. Store the project outside ~/tools/ghidra_12.1.3_PUBLIC so replacing the application directory does not remove your analysis data. Back up both the .gpr file and its matching .rep directory when a project matters.
To upgrade, download the new official release beside the old directory, verify its checksum, and test a copy of important projects before retiring the previous version. Ghidra is not installed through a traditional uninstaller: close the application, preserve projects and scripts, then remove the extracted application directory. Review user settings and caches separately if you want a clean reset.
If you need automation rather than the desktop UI, use support/analyzeHeadless from the same verified distribution. Pin the Ghidra version and JDK version in scripts or containers, write projects to controlled paths, and do not pass untrusted samples to a privileged service.
Questions about installing Ghidra on Ubuntu
Do I need sudo to install Ghidra on Ubuntu?
Usually no. Use sudo for apt when installing openjdk-21-jdk, then extract the Ghidra ZIP into a directory owned by your user and run ./ghidraRun without sudo.
Can I install Ghidra with apt or Snap?
Ubuntu repositories or Snap may provide community packages, but they can differ in version and provenance from the upstream project. For the current official build, choose the PUBLIC ZIP from the NationalSecurityAgency/ghidra GitHub release and verify its SHA-256.
Does Ghidra work on Ubuntu 24.04?
A supported 64-bit Ubuntu desktop can run the official Java distribution when a compatible 64-bit JDK 21 is installed. Check the current Ghidra documentation and your desktop or graphics environment for release-specific issues.
How do I install Ghidra on Ubuntu in WSL2?
Use the same JDK 21 and official ZIP steps. WSLg or an X server is needed for the desktop UI; without a display, use support/analyzeHeadless for batch work and inspect DISPLAY before debugging Ghidra itself.
Why does Ghidra say that Java is not supported?
Ghidra 12.1 needs a 64-bit JDK 21. Check java -version, javac -version, JAVA_HOME, and the architecture of the selected JDK. A Java 17 runtime or a JRE-only package is not the same prerequisite.
How do I check the Ghidra version after installation?
Check the extracted directory name and the release ZIP filename, then open Ghidra and review its About or version information. Keep the release tag, filename, and SHA-256 record with the installation notes.
Install Ghidra from the verified Ubuntu path
Use the official Ghidra 12.1.3 ZIP, JDK 21, SHA-256 verification, and ./ghidraRun instead of an unverified mirror or wrapper.