
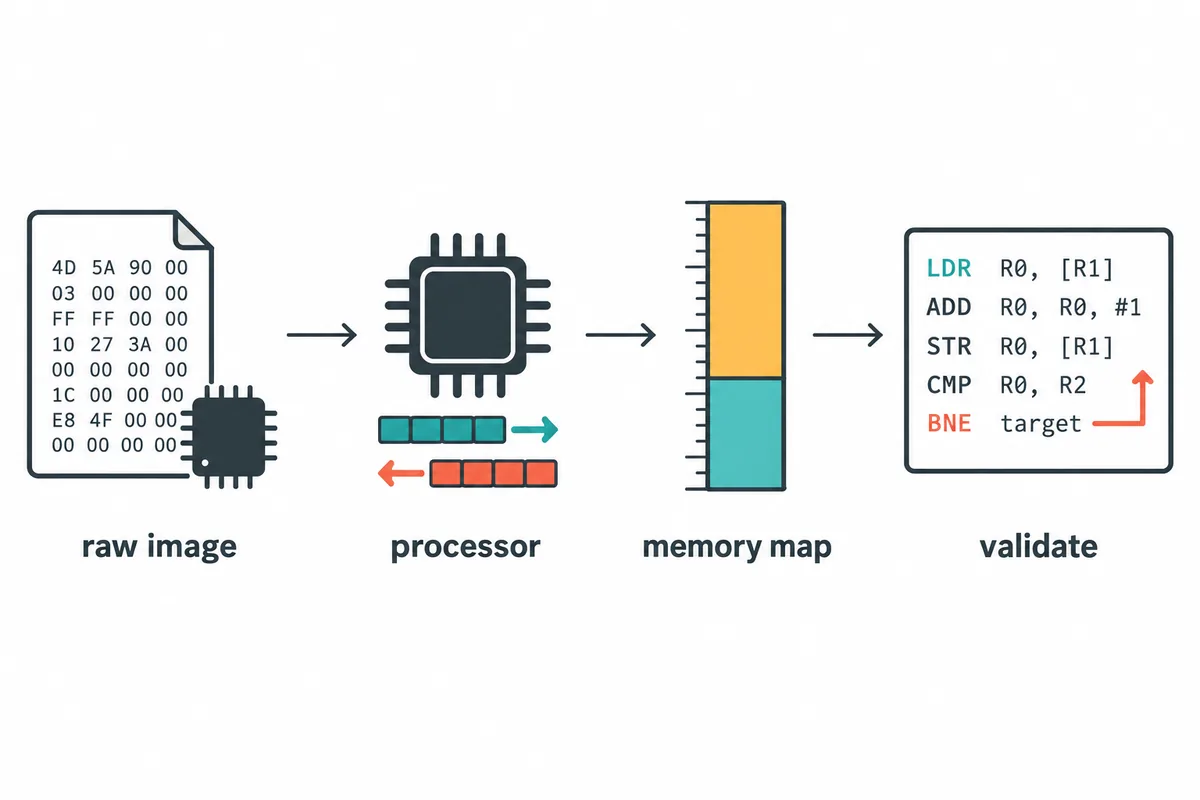
What makes Ghidra firmware analysis different?
PE and ELF files carry headers for sections, machine type, and loading. A raw firmware dump may be only bytes combining bootloader, application, constants, padding, or data copied to RAM, with no processor, byte order, or runtime address recorded.
A Ghidra firmware analysis workflow must start from device evidence. A wrong language or base can still produce plausible instructions and false references. Verify import choices against a datasheet, linker script, SDK, bootloader source, or other reliable device evidence.
| Input | What Ghidra can infer | What you must verify |
|---|---|---|
| PE or ELF | Container format and often a machine type | Unusual sections, custom loaders, and runtime behavior |
| Raw firmware dump | Byte content and possible patterns | Processor language, endianness, load address, and memory regions |
| Several extracted pieces | Each imported file as a separate byte range | How pieces relate to device addresses and each other |
Preserve the dump and write down what is known
Keep the original image unchanged and analyze a working copy. Record its source, date, size, and SHA-256 so notes can be tied to the same bytes; a hash does not prove safety or authorization.
Before import, collect supported facts: device revision, chip family, instruction set, byte order, flash origin, boot entry, and split-image offsets. Prefer a board manual, linker map, build configuration, vendor documentation, or source over an address copied from another device. Mark unknowns explicitly.
Analyze only firmware and hardware that you own or are authorized to inspect. This guide is technical information, not legal advice or permission to reverse engineer a target.
- Keep the original file read-only and record its SHA-256 hash.
- Separate file offsets, physical addresses, and virtual addresses in your notes.
- Record the evidence and confidence for each architecture or address choice.
- Use a disposable project when testing uncertain import settings.
Choose a processor language before trusting a disassembly
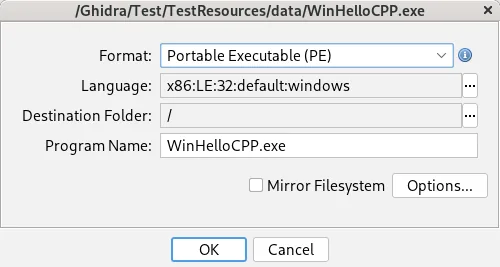
Ghidra's processor language controls instruction decoding and registers. Choose the family, instruction-set variant, address size, and endianness from device evidence. Similar names can decode different modes; plausible mnemonics are not validation.
The compiler specification shapes calling conventions and types; for raw data it may be provisional. Identify mode changes such as ARM and Thumb from reset code or documentation instead of forcing one mode across all addresses.
- 1
Identify the processor family
Use the documented chip or core, not the filename alone.
- 2
Confirm mode and endianness
Cross-check build artifacts, reset code, configuration, and known instruction bytes.
- 3
Keep uncertainty visible
Test plausible variants in separate program copies and compare validated regions.
Import a raw firmware image in Ghidra
A reliable Ghidra firmware analysis workflow starts by creating a project and importing the dump as Raw Binary if it has no recognized executable container. Select the evidence-based processor language. Enter a load address only when documentation or build artifacts support it; otherwise leave the assumption unresolved.
For an uncertain dump, postpone Auto Analysis on a working copy while checking language and address settings. Once supported, run analysis and keep the original hash with the project notes.
Separate file offsets from target addresses
A file offset is a byte position; a target address is where the device maps it. For a contiguous image, target address = verified base address + file offset. This does not prove the base, contiguity, or entry point.
Record base-address evidence separately from the reset entry. A bootloader may copy ROM bytes to RAM, and images may be mirrored or banked. Derive addresses for the exact model; never reuse another board's values or assume ROMBASEADDR is universal.
A file offset, a memory load address, and an execution entry point may differ. Keep them in separate fields in your notes and explain the source for each one.
target_address = verified_base_address + file_offsetBuild a memory map without inventing regions
For Ghidra firmware analysis, use Memory Map to distinguish file-backed ranges from runtime-only memory. Check each block's start, length, permissions, and backing file. Mark flash read-only when supported; add RAM and memory-mapped peripherals only with evidence.
Map split or copied code at its supported destination and record the source offset. Keep uninitialized RAM, peripherals, mirrors, and reserved gaps distinct; invented executable blocks create false references and functions.
| Region type | What to record | Common mistake |
|---|---|---|
| File-backed flash or ROM | Input file, offset, destination address, and read permissions | Treating the first byte in the file as a universal address |
| Uninitialized RAM | Supported address range and read/write/execute permissions | Filling the block with zeros and analyzing them as file content |
| Memory-mapped I/O | Documented peripheral range and access behavior | Treating every reference as ordinary program data |
| Copied or split region | Source offset, destination start, length, and evidence | Mapping a copy to its source address instead of its runtime destination |
Stage analysis and validate the startup path
Analyze a small region after language and memory blocks are supported. Check instructions against the processor manual and confirm branches land in mapped code. A Cortex-M vector table can suggest a stack value and reset handler, but other targets differ; verify the format first.
Broaden analysis only after early code is coherent. Review warnings, references, function boundaries, strings, and data accesses. Keep boot and application images distinct and preserve each experiment in a clean project.
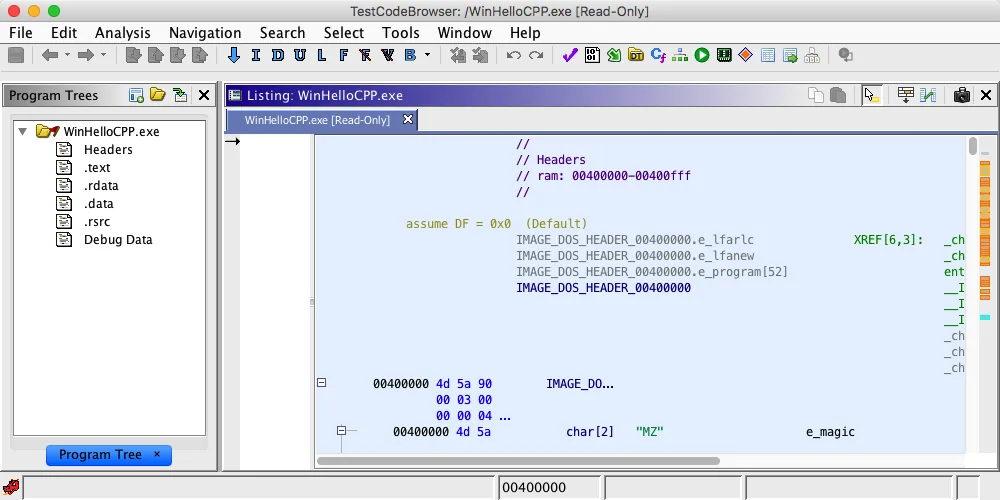
Validate findings in Listing, references, and Decompiler
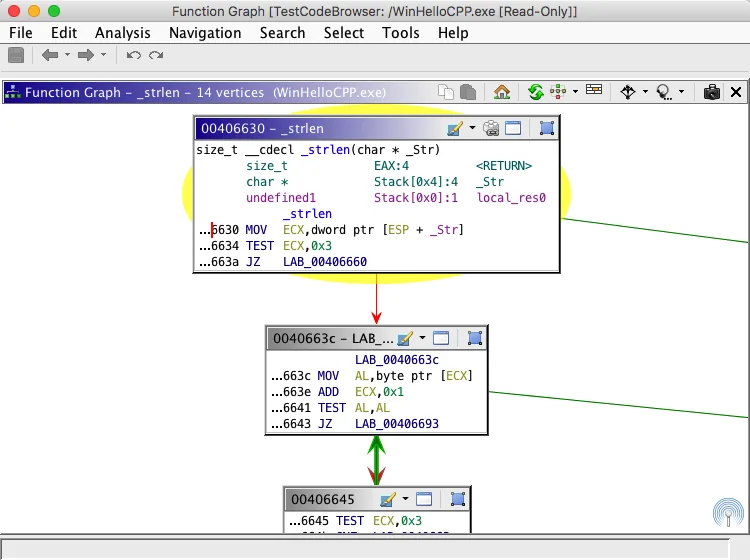
Treat strings and constants as leads. Follow references, inspect bytes and instruction boundaries in Listing, then compare control flow in Function Graph. Use the Decompiler for a readable hypothesis and verify key conclusions against instructions and memory accesses.
Plausible functions can still use the wrong address or mode. Re-check callers, branches, and cross-region references. See the Decompiler guide for pseudocode limits and the search guide for strings, addresses, and XREFs.
Troubleshoot common Ghidra firmware analysis errors
When Ghidra firmware analysis looks wrong, revisit assumptions before renaming output. Check the file hash, language, endianness, base address, mapped range, execute permission, and instruction mode.
Keep a note of the project copy, setting changed, evidence, and result. That makes it possible to tell a genuine correction from an accidental change in interpretation.
| Symptom | Check first | Next step |
|---|---|---|
| Nonsense instructions | Processor variant, endianness, and instruction mode | Compare several known bytes with the device documentation |
| Branches land outside mapped memory | Base address, file offsets, and copied regions | Rebuild the map from source and destination evidence |
| Decompiler output is mostly undefined | Language, function boundary, and mapped data | Verify instruction bytes and define only supported boundaries |
| Too many suspicious functions | Whether analysis covered data, padding, or peripherals | Narrow the executable region and rerun a controlled pass |
| Strings or pointers look shifted | Word size, endianness, and alignment | Compare raw bytes with references in Listing |
Know what this workflow does not establish
Ghidra firmware analysis can decode and organize an image; it does not unpack every vendor container, emulate hardware, prove code safety, or identify every peripheral. Extraction, signature verification, and vulnerability assessment are separate tasks. Record evidence and limits rather than claiming that plausible pseudocode proves behavior.
Start with official GhidraDocs. The ARM Cortex-M example and Magic Lantern map example apply only to their documented targets.
- Use the Ghidra beginner tutorial for project setup and a first static-analysis pass.
- Use the Headless Analyzer guide when the next task is controlled batch analysis or report generation.
- Use the installation guide for official release verification, JDK setup, and first launch.
Ghidra firmware analysis FAQ
Can Ghidra analyze a raw firmware binary?
Yes. Import it as a raw binary, select a processor language supported by evidence, and define justified address ranges. A raw import does not tell Ghidra the device architecture or memory layout by itself.
How do I find the correct base address for firmware in Ghidra?
Use the device datasheet, linker map, vendor SDK, bootloader, or documented image format. Do not infer the base from the file name, a different device, or the reset entry point; those values can be different.
Should I run Auto Analysis immediately after importing raw firmware?
If the processor language or address map is uncertain, first check those settings and consider postponing analysis on a working copy. Once the assumptions are supported, run a controlled analysis pass and review its warnings.
Why does Ghidra show nonsense instructions for firmware?
Common causes include the wrong processor variant, endianness, instruction mode, image base, or memory mapping. Compare several decoded instructions with target documentation and inspect the original bytes before changing names or function boundaries.
Does the Ghidra Decompiler recover the original firmware source code?
No. It produces an analysis view of machine code, not the original source. Verify important pseudocode conclusions in Listing, references, and the relevant memory map.
Can I copy memory addresses from another firmware guide?
Only when the guide documents the same device, hardware revision, and firmware layout. Otherwise, treat its addresses as an example and derive your own map from the target's documentation and image evidence.